Appearance
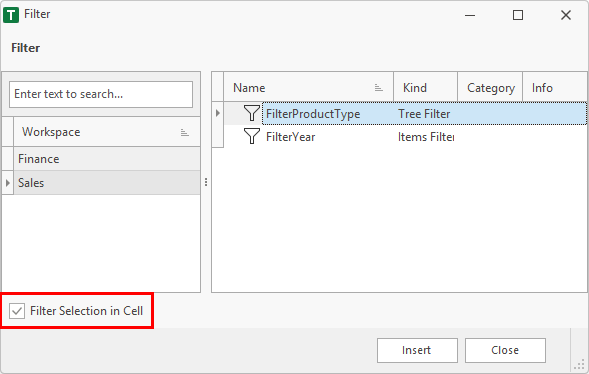
Insert Filter
Opens a dialog to select a workspace filter. The window is divided into two areas. On the left, the opened workspace are displayed. On the right, the user can select a filter of the selected workspace.

After click on the Insert button, the active cell of the worksheet is filled with a tag, the fill color is changed to orange and the cell below is selected.

To insert another filter, the filter must be selected and the Insert button must be used again.

The Close button closes the dialog.
Tag Format
The inserted cell tag has a specified format. The addin searches for this format. When the tag matches, the filter is displayed in the filter pane or cell.
- The cell tag starts with << and ends with >>.
- First, a static text indicates where the filter should be displayed. FilterPane meens the filter is displayed in the task pane. Filter meens the filter values are displayed in the cell below. After this text, a # must be set.
- Then a text pair follows, which is separated by an equals sign. The first part indicates the workspace and the second parts indicates the filter of the workspace.
Filter Selection in Filter Pane
In the sample above, the Filter Selection in Cell option is disabled.

This meens the filters are display in the filter pane.
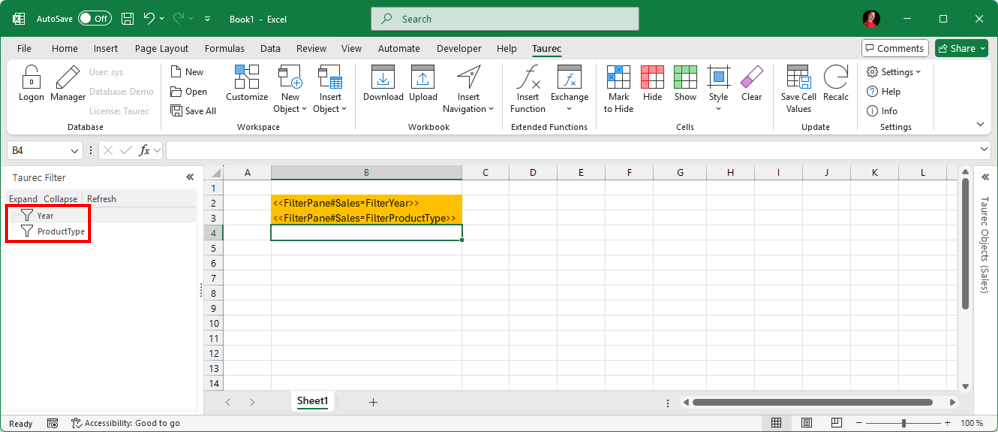
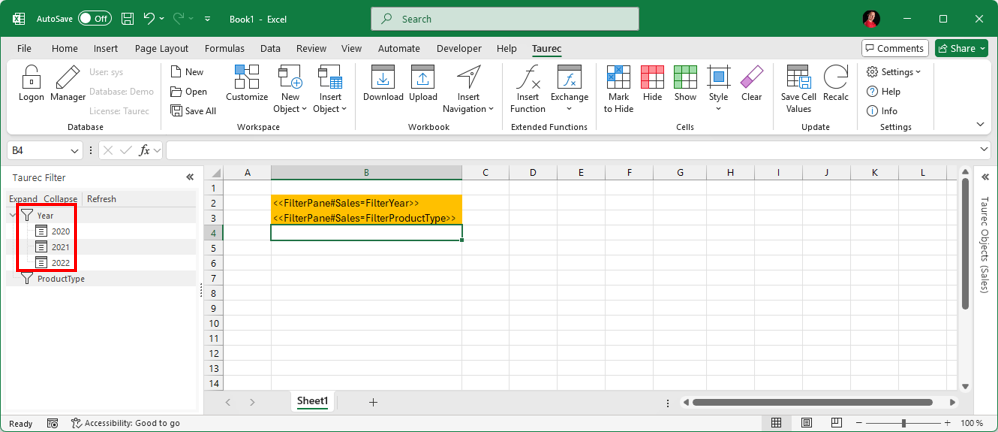
A double click on the filter icon or text opens a dialog to edit the filter. In this sample it is the Year text.
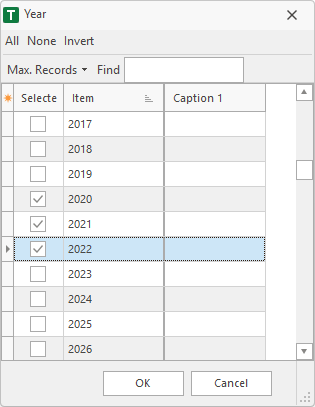
The changed filter values are shown in the filter pane.
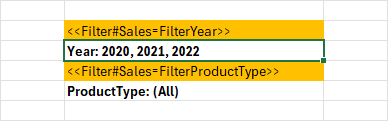
Filter Selection in Cell
The Filter Selection in Cell option can be enabled in the insert dialog.
Now, two cells are used. The first cell contains the tag. The cell below shows the values of the selected filter. The format of the info cell can be changed.
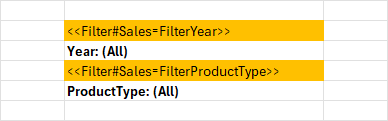
When the user double clicks an the filter values cell, the addin checks the tag cell above. If the format matches, a dialog comes up to edit the filter. In this sample it is the Year: (All) cell.
The changed filter values are shown in the filter value cell.